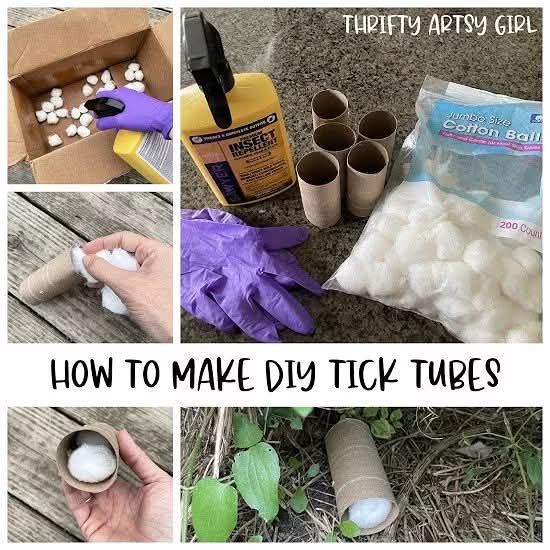
After the cotton balls are completely dry you can stuff your toilet paper rolls.
I stuffed them so they were almost full and could easily come out. There are a few tick tube tutorials, like this one on Practical Primitive, that use dryer lint, which is another cotton material you can use. However if you use dryer sheets the mice might not like the smell of your lint and potentially won’t take the dryer lint.
After stuffing your toilet paper tubes you should place the tick tubes in areas of your yard that are wooded, the perimeter of your yard, and anywhere that looks like a mouse would go like an overgrown area. One more note, since Permethrin is a broad spectrum insecticide do not place tick tubes in areas where it might affect honey bees or other pollinating insects.
Permethrin is not water soluble so it won’t wash off in the rain and one application should last about 6 weeks so you should replace your tick tubes every spring and late summer. If you don’t notice a decrease in the tick population in your yard, simply put out more tick tubes. If you want to see if mice are taking the “bait” check on your tick tubes to see if any cotton is missing and if it’s all gone put out another tick tube.
I love these DIY tick tubes because they are super affordable, they are biodegradable and anything that can prevent tick-borne diseases is a win in my book! Hopefully this DIY tick tube tutorial helps you out with protecting your yard from nasty, disease causing ticks!
To see more pictures or more information on tick tubes and my Lyme Disease journey check out my blog post:
