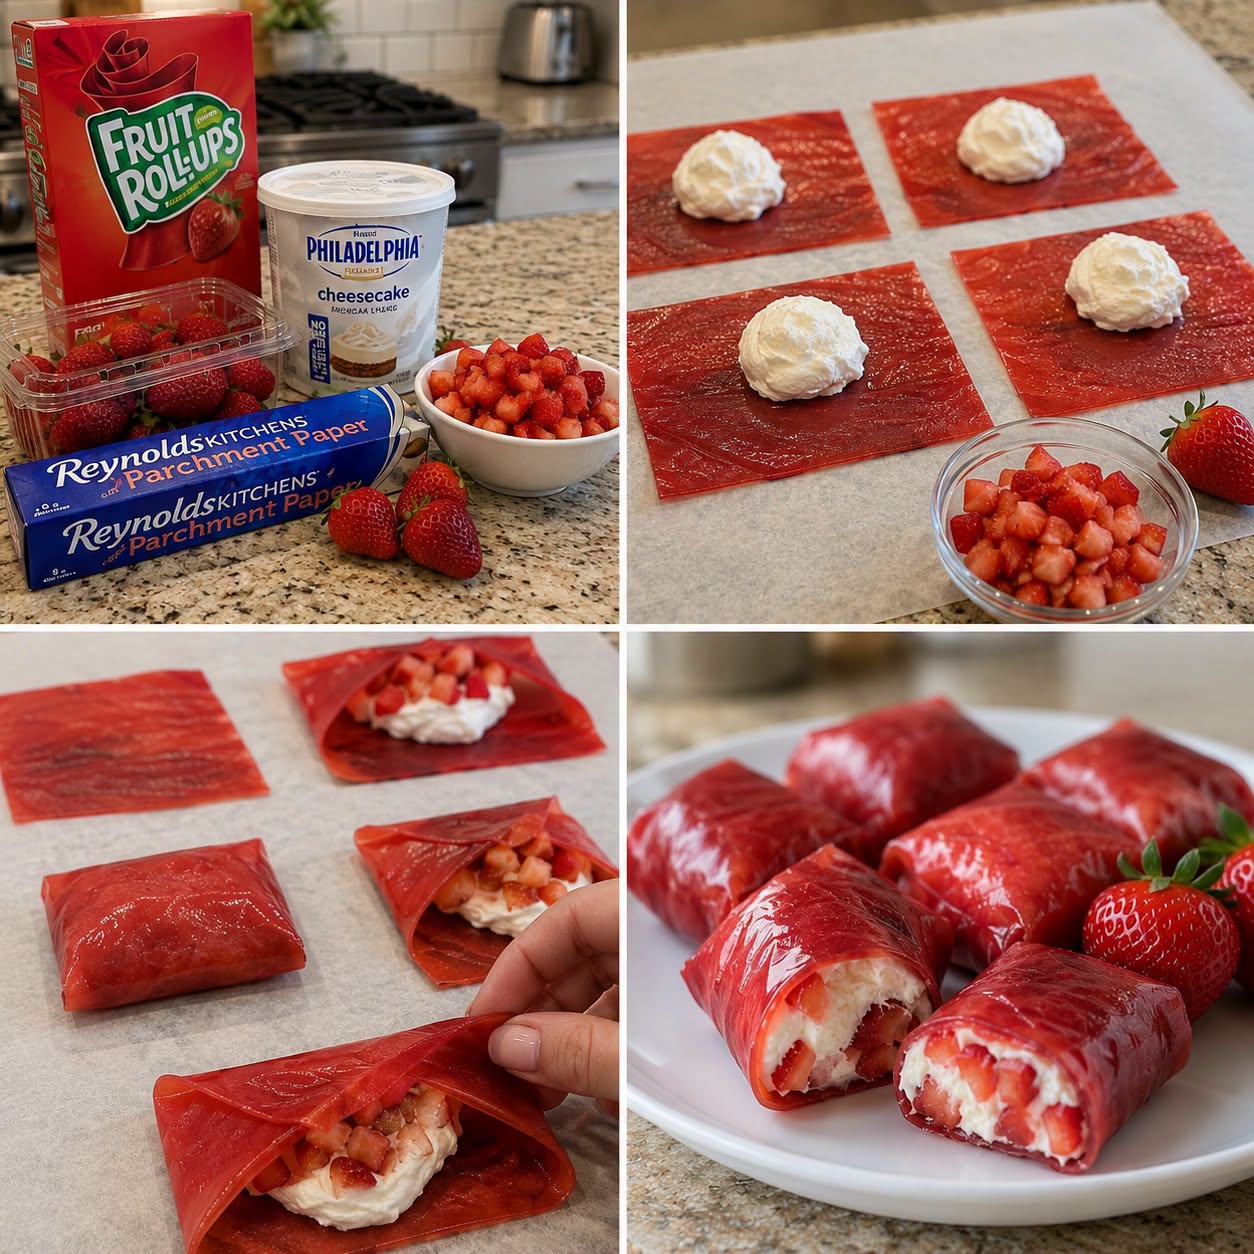
Creating a clean and organized workspace is key to any successful recipe. Lay down a sheet of parchment paper on a flat surface or baking sheet. This will prevent your Fruit Roll-Ups Cheesecake Bites from sticking and make cleanup a breeze. Plus, when you’re busy and the kitchen is a bit chaotic, it’s nice to have a designated area for everything.
Unroll the Fruit Roll-Ups
Unrolling the Fruit Roll-Ups is one of the most enjoyable steps. As you peel them apart, think about the colorful presentation they’ll create. Aim to keep these flat and intact. If you find any imperfections, don’t worry too much—it all gets wrapped up in deliciousness. Lay them out on your parchment-lined surface, side by side.
Fill with cheesecake and strawberries
Now it’s time for the fun part: filling the Fruit Roll-Ups! In a mixing bowl, beat together your softened cream cheese, powdered sugar, and vanilla extract until smooth. This creamy mixture will serve as the base for your cheesecake bites
Using a spoon or a piping bag, place a small dollop of the mixture onto each Fruit Roll-Up, followed by a few pieces of chopped strawberries. Make sure not to overload it; you want these bites to fold easily without spilling out their delicious filling.
Fold and seal the bites
With the cheesecake and fruit nestled inside, it’s time to fold and seal these bites. Carefully lift one edge of the Fruit Roll-Up and fold it over the filling, then gently press the edges together to seal. You can also use a little water on your fingers to help stick the edges together if they’re not sealing well. Aim for a neat rectangle shape, resembling a small pocket of sweetness.
Freeze and serve
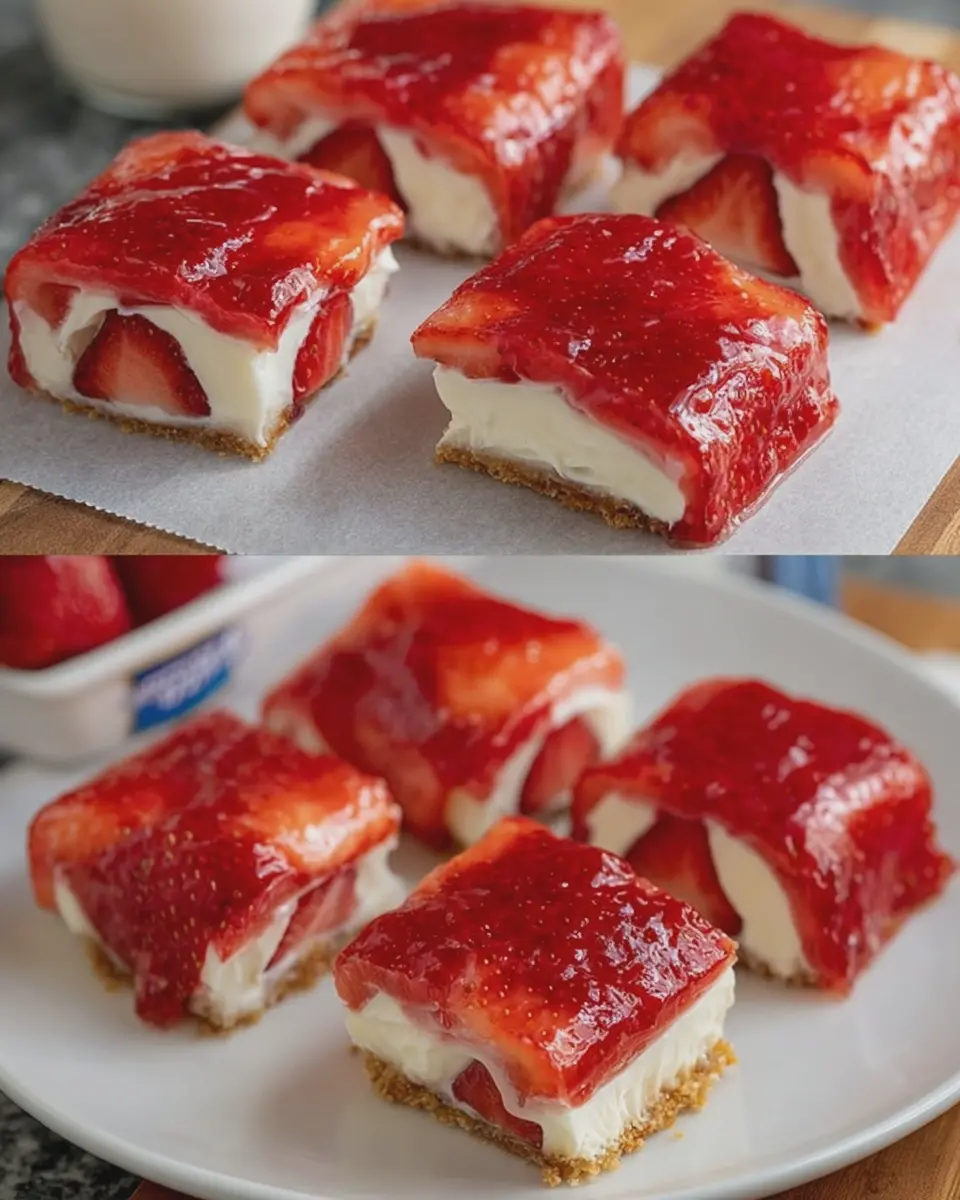
Once you’ve filled and sealed all your bites, place them in the freezer for about 30 minutes. This helps firm everything up, allowing you to enjoy their fresh taste and chewy texture when you’re ready to serve.
After they’re set, you can serve them right away or store them in an airtight container for later. Whether you top them with whipped cream or enjoy them plain, these Fruit Roll-Ups Cheesecake Bites are destined to be a crowd-pleaser.
If you’re looking for more inspired twists on classic recipes, you might want to check out sources like Food Network for creative ideas or Bon Appétit for tips on using seasonal fruits. Happy snacking!
Variations on Fruit Roll-Ups Cheesecake Bites
Crafting Fruit Roll-Ups Cheesecake Bites is a delightful adventure, and there’s so much room for creativity! Here are two mouthwatering variations to elevate your dessert game.
Chocolate-Covered Cheesecake Bites
If you’re a chocolate lover, this variation is a must-try! Start by preparing your basic cheesecake mixture, then dip each cheesecake bite into melted chocolate. Here’s how to do it:
- Ingredients: Use dark, milk, or white chocolate to suit your taste, along with your prepared Fruit Roll-Ups Cheesecake Bites.
- Technique: Melt the chocolate in a microwave or double boiler. Dip each chilled cheesecake bite into the chocolate, then place it on parchment paper. For an extra touch, sprinkle crushed nuts or sea salt before the chocolate sets.
- Satisfaction Guaranteed: The combination of creamy cheesecake and rich chocolate will leave everyone asking for seconds!
Get Tasty Recipes Delivered to Your Inbox!
Subscribe to get delicious recipes, kitchen tips, and meal inspiration delivered straight to your inbox. Join our community of food lovers and never miss a recipe!
We use your personal data for interest-based advertising, as outlined in our Privacy Notice.
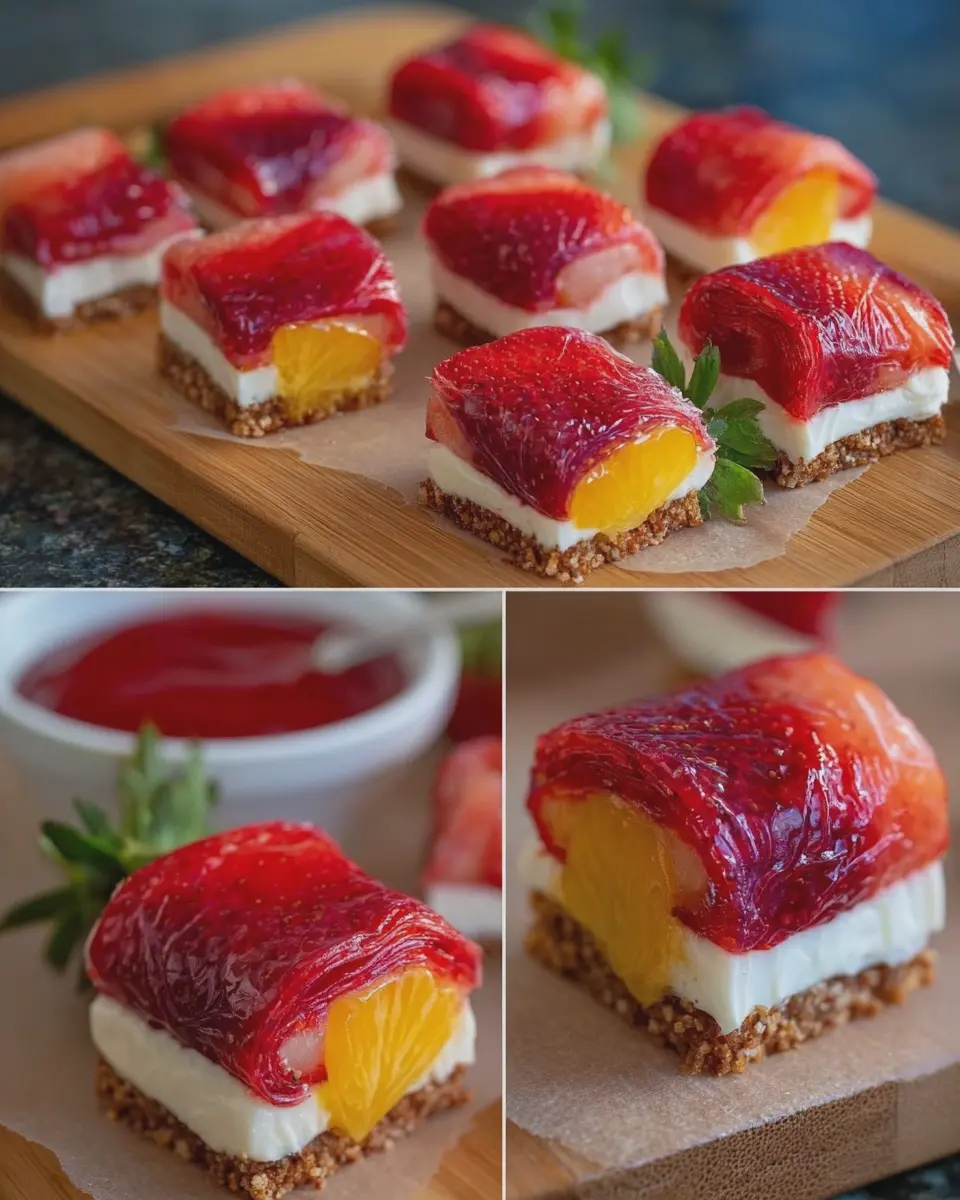
Different Fruit Combinations
While traditional fruit roll-ups are great, experimenting with various fruit flavors adds a unique twist. Think strawberry, mango, or even exotic options like passion fruit. Consider these ideas:
- Berry Bliss: Blend in some mixed berries with your cheesecake mixture for a fruity explosion.
- Tropical Delight: Use mango or pineapple Fruit Roll-Ups to evoke that sunny, beachy vibe. A hint of coconut in the cheesecake will take it to the next level.
- Citrus Zing: Try orange or lemon-flavored fruit roll-ups for a refreshing zing that cuts through the sweetness of the cheesecake.
By playing around with flavors, you can create a centerpiece that’s utterly unique and flavorful. If you’re curious about more fruit combinations, resources like The Spruce Eats offer great inspiration.
No matter which variations you choose, Fruit Roll-Ups Cheesecake Bites will undoubtedly impress your friends and family!
Cooking tips and notes for Fruit Roll-Ups Cheesecake Bites
Creating Fruit Roll-Ups Cheesecake Bites is a fun and easy process, perfect for impressing friends or treating yourself! Here are some handy tips to elevate your dessert game.
Choose Quality Ingredients
- Cheese Matters: Use full-fat cream cheese for the best texture and flavor. A rich cheesecake filling will complement the fruity flavor of the roll-ups beautifully.
- Fruit Roll-Ups Varieties: Explore different flavors of Fruit Roll-Ups. Experimenting with tropical or mixed berry flavors can yield delightful twists.
Assembly Tips
- Chill Before Cutting: After rolling, place your filled Fruit Roll-Ups in the fridge for about 30 minutes. This will help them firm up, making them easier to cut into bite-sized pieces without falling apart.
Optional Add-Ins
- Want to elevate the creaminess? Consider adding a dollop of Greek yogurt to your cheesecake mixture. It’ll enhance the flavor while keeping it light!
- For extra texture, toss in some finely chopped nuts or crushed graham crackers for a delightful crunch.
These Fruit Roll-Ups Cheesecake Bites are best enjoyed fresh, but if you have leftovers, store them in an airtight container in the refrigerator for a couple of days.
For additional inspiration, check out articles on dessert plating techniques or explore unique sweet treats on Bon Appétit. Your friends will be asking for your secret in no time!